Canyon Clash
Our weekly alliance battlefield. Won by controlling the map, not by kills: hold your zone, hit the boss at 5 and 15, all-in on the Energy Cell at 20.
A points race won by coordination, not raw power: a coordinated ThO beats a stronger, disorganized alliance every time.
The map
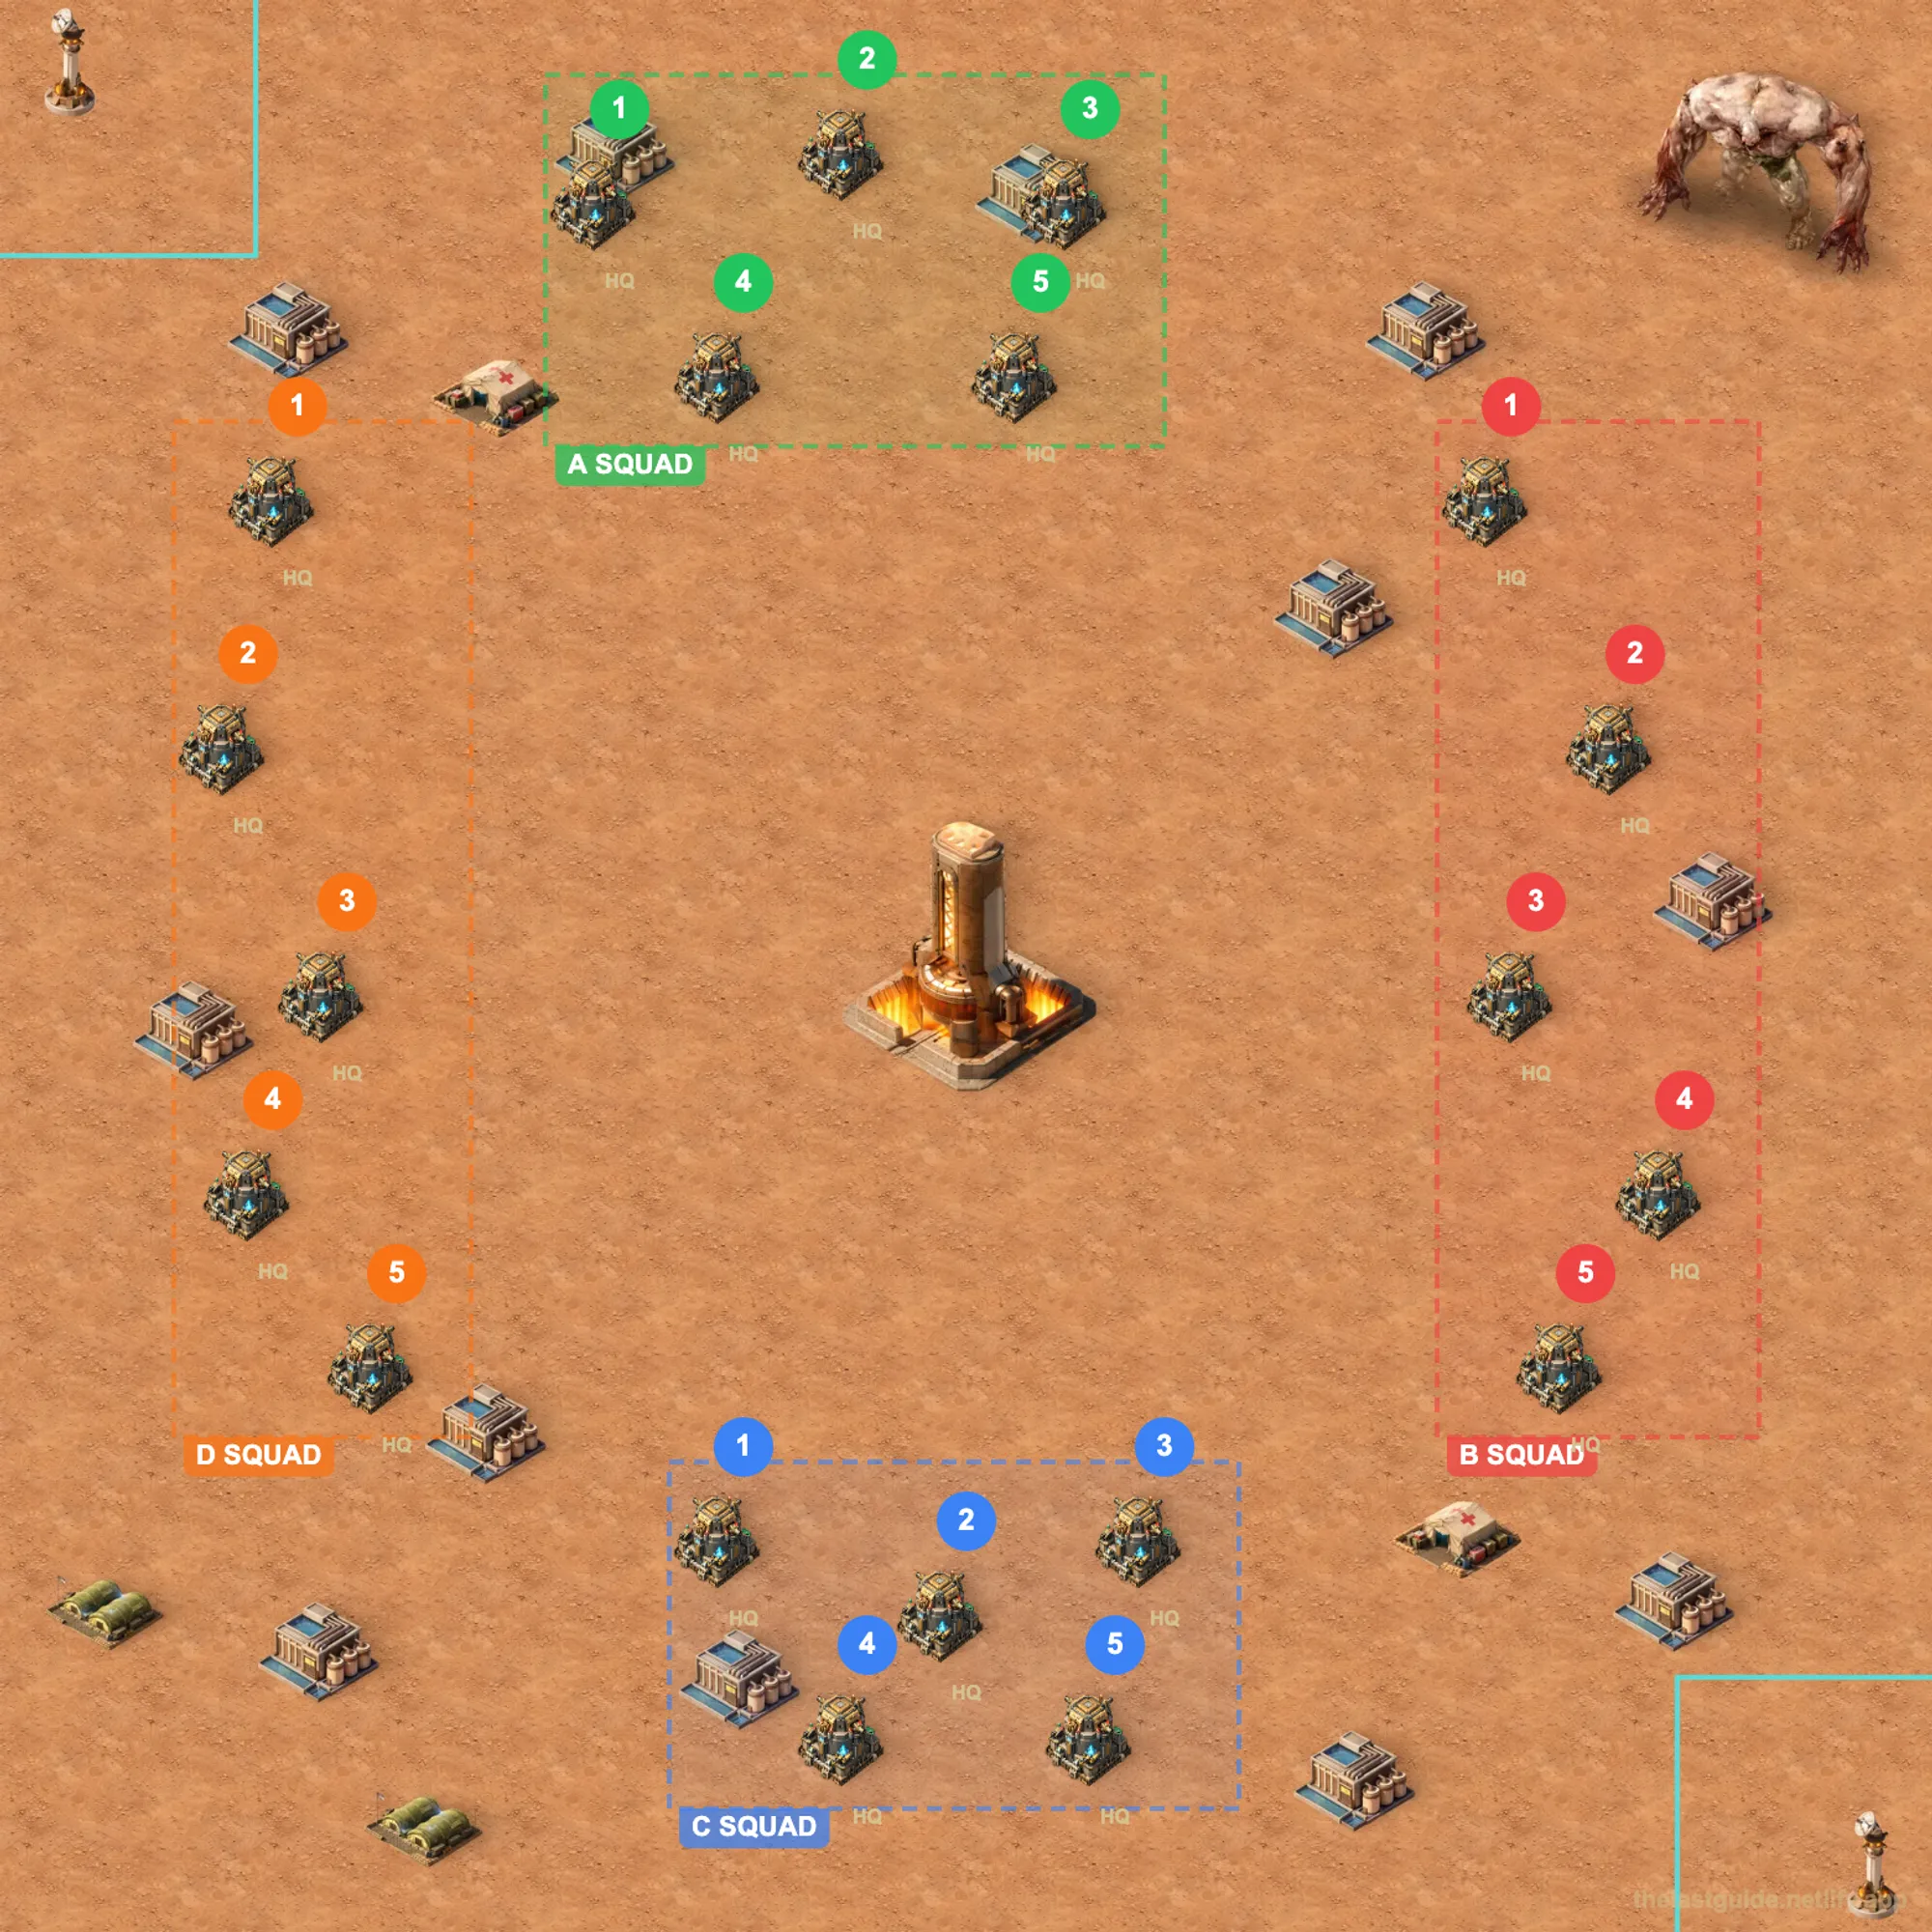
Four squad zones (A top, B right, C bottom, D left), each with 5 numbered HQ start positions, all converging on the central Energy Cell. Assignments are set each week by who's participating. Plan with the Canyon Map Planner.
How capturing works
- March troops to an uncaptured or enemy-held building: it captures automatically.
- Bigger armies capture faster and beat defenders. Never send lone scouts.
- Captured buildings generate benefits for the team: leave troops to hold them.
- Outnumbered? Pull back and call for backup.
Formations
- 1st formation (strongest): attack and fight over key objectives.
- 2nd / 3rd formations: hold and defend captured buildings.
Squad zones
Check chat before the match for your squad and numbered start position.
🟢 A Squad: Top zone
- Spawn at A1–A5. Take and hold the top-zone buildings + the nearby Field Hospital.
- Strongest formations on the Hospital; light formations hold the refineries.
🔴 B Squad: Right zone
- Spawn at B1–B5. Capture the right-column buildings and refineries.
- Capture fast, hold light, stay mobile. The Canyon Captain sits in your corner (top-right).
🔵 C Squad: Bottom zone / strike force
- Spawn at C1–C5. Hold the bottom zone + the second Field Hospital, then flex:
- Start: disrupt the enemy's economy.
- 10 min: contest Military Centers.
- 5 & 15 min: push the Canyon Captain.
- 20 min: all-in on the central Energy Cell.
🟠 D Squad: Left zone
- Spawn at D1–D5. Take and hold the Military Bases + left-side refineries.
- Leave strong troops at every base; light formations on refineries.
Objectives & scoring
Values from a community guide: treat them as relative priority.
| Objective | Priority | First capture | Per min |
|---|---|---|---|
| ⚡ Energy Cell (center) | Critical | ~100,000 | — |
| ⚔️ Military Bases | High | ~2,700 | ~1,800 |
| 🏥 Field Hospitals (×2) | High | ~1,800 | ~1,200 |
| 💧 Water Refineries | Medium | ~900 | ~600 |
| 🏆 Canyon Captain | High | Battle buffs | — |
Battle timeline (40 min)
- 0:00 Start: rush your zone's objectives. First-capture bonuses are real.
- 5:00 Canyon Captain #1: Squad C + free players hit the boss.
- 10:00 Mid-game: Squad C → Military Centers. D reinforces. A & B hold.
- 15:00 Canyon Captain #2: Squad C + available forces push hard.
- 20:00 Energy Cell (the decider): all forces converge. Strongest player carries it, escort protects the return.
Tips
- Be quick: first-capture bonuses reward rushing.
- Leave strong troops at Military Bases.
- Use 2nd/3rd formations to hold refineries.
- Tap the right-side icons to jump to objectives.
- Watch the mini-map and the countdown timers.
- Communicate.
Coordination protocol
- Comms on.
- Know your squad and start position before the match.
- Call target-swaps the instant a timer hits zero.
- Use map markers for every call.
- Teleport discipline: free with a 3-min cooldown; flank and reinforce, don't panic-clump.
Matchmaking
Matchmaking uses the combined power of our top 30 members. Having 20+ strong players is what makes us competitive.
The short list
- Hold your zone's buildings: that's the score.
- Know your squad and rush your start positions.
- Boss at 5 & 15; everyone else holds.
- 20:00 = all-in on the Energy Cell. Escort the carrier.
- Comms on, move together.